To install 3rd party players which can play mp3 and other windows supported format like avi and dat etc., do following steps:
Before installing you should upgrade the repository
package with Third Party Repositories
# rpm -Uhv http://rpm.livna.org/livna-release-7.rpm
Use yum with root as user in your command line. Yum can automatically download
and install a program and all of its dependencies.
Mp3 player:
1)xmms
yum install xmms xmms-mp3 xmms-faad2
2) Audacious
yum install audacious audacious-plugins-nonfree*
3)Rythmbox/Gstreamer
yum install gstreamer-plugins-ugly gstreamer-plugins-bad
4)Amorak
yum install amarok amarok-extras-nonfree
Real Player
Before installing realplayer,compact-libstdc++-33 libraries should be installed.
yum install compat-libstdc++-33.
Download RealPlayer 10.0 GOLD from: http://www.real.com/linux/.
rpm -ivh RealPlayer10GOLD.rpm
Xine Multimedia Player
yum -y install xine xine-lib xine-skins xine-lib-extras-nonfree libdvdcss
Mplayer
yum -y install mplayer mplayer-gui mplayer-skins mplayer-fonts mplayerplug-in
VLC
yum -y install videolan-client
Saturday, October 06, 2007
Multimedia in fedora core 7
Monday, July 30, 2007
QUICK LINUX GUIDE
| FILE AND DIRECTORY BASICS | This cateogry also includes utilities that change file/directory properties and permissions |
| ls | List files/directories in a directory, comparable to dir in windows/dos. |
| ls -la | Shows all files (including ones that start with a period), directories, and details attributes for each file. |
| cd | Change directory (e.g cd /usr/local/bin) |
| cd ~ | Go to your home directory |
| cd - | Go to the last directory you were in |
| cd .. | Go up a directory |
| cat | Print file contents to the screen |
| cat filename.txt | Print the contents of filename.txt to your screen |
| tail | Similar to cat, but only reads the end of the file |
| tail /var/log/messages | See the last 20 (by default) lines of /var/log/messages |
| tail -f /var/log/messages | Watch the file continuously, while it's being updated |
| tail -200 /var/log/messages | Print the last 200 lines of the file to the screen |
| head | Similar to tail, but only reads the top of the file |
| head /var/log/messages | See the first 20 (by default) lines of /var/log/messages |
| head -200 /var/log/messages | Print the first 200 lines of the file to the screen |
| more | Llike cat, but opens the file one screen at a time rather than all at once |
| more /etc/userdomains | Browse through the userdomains file. hit Spaceto go to the next page, q to quit |
| less | Page through files |
| od | View binary files and data |
| xxd | Also view binary files and data |
| gv | View Postscript/PDF files |
| xdvi | View TeX DVI files |
| nl | Number lines |
| touch | Create an empty file |
| touch /home/burst/public_html/404.html | Create an empty file called 404.html in the directory /home/burst/public_html/ |
| file | Attempts to guess what type of file a file is by looking at it's content. |
| file * | Prints out a list of all files/directories in a directory |
| cp | Copy a file |
| cp filename filename.bak | Copies filename to filename.bak |
| cp -a /etc/* /root/etc/ | Copies all files, retaining permissions form one directory to another. |
| cp -av * ../newdirectory | Copies all files and directories recurrsively in the current directory INTO newdirectory |
| mv | Move a file command |
| mv oldfilename newfilename | Move a file or directory from oldfilename to newfilename |
| rm | delete a file |
| rm filename.txt | deletes filename.txt, will more than likely ask if you really want to delete it |
| rm -f filename.txt | deletes filename.txt, will not ask for confirmation before deleting. |
| rm -rf tmp/ | recursively deletes the directory tmp, and all files in it, including subdirectories. |
| chmod | changes file access permissions. The set of 3 go in this order from left to right: 0 = --- No permission |
| chmod 000 | No one can access |
| chmod 644 | Usually for HTML pages |
| chmod 755 | Usually for CGI scripts |
| chown | Changes file ownership permissions The set of 2 go in this order from left to right: USER - GROUP |
| chown root myfile.txt | Changes the owner of the file to root |
| chown root.root myfile.txt | Changes the owner and group of the file to root |
| stat | Display file attributes |
| grep | Llooks for patterns in files |
| grep root /etc/passwd | Shows all matches of root in /etc/passwd |
| grep -v root /etc/passwd | Shows all lines that do not match root |
| ln | Create's "links" between files and directories |
| ln -s /usr/local/apache/conf/httpd.conf /etc/httpd.conf | Now you can edit /etc/httpd.conf rather than the original. changes will affect the orginal, however you can delete the link and it will not delete the original. |
| wc | Word count |
| wc -l filename.txt | Tells how many lines are in filename.txt |
| find | Utility to find files and directories on your server. |
| find / -name "filename" | Find the file called "filename" on your filesystem starting the search from the root directory "/". |
| locate filename | Find the file name and path of which contains the string "filename". Run 'updatedb' to build index. |
| EDITORS | Most popular editors available on UNIX platforms. |
| pico | Friendly, easy to use file editor |
| pico /home/burst/public_html/index.html | Edit the index page for the user's website. |
| vi | Popular editor, tons of features, harder to use at first than pico |
| vi filename.txt | Edit filename.txt. All commands in vi are preceded by pressing the escape key. Each time a different command is to be entered, the escape key needs to be used. Except where indicated, vi is case sensitive. Fore more commands go to: http://www.intellink.net/vi-qref.htm H --- Upper left corner (home) :q! --- This force quits the file without saving and exits vi |
| emacs | Another popular editor. For more commands go to http://www.hsrl.rutgers.edu/ug/emacs_qref.html C-\ t --- Tutorial suggested for new emacs users. |
| emacs filename.txt | Edit filename.txt. While you're in emacs, use the following quickies to get around: C-x C-f --- read a file into emacs C-f --- move forward one character |
| NETWORK | Some of the basic networking utilities. |
| w | Shows who is currently logged in and where they are logged in from. |
| who | This also shows who is on the server in an shell. |
| netstat | Shows all current network connections. |
| netstat -an | Shows all connections to the server, the source and destination ips and ports. |
| netstat -rn | Shows routing table for all ips bound to the server. |
| netstat -an |grep :80 |wc -l | Show how many active connections there are to apache (httpd runs on port 80) |
| top | Shows live system processes in a formatted table, memory information, uptime and other useful info. While in top, Shift + M to sort by memory usage or Shift + P to sort by CPU usage |
| top -u root | Show processes running by user root only. |
| route -n | Shows routing table for all ips bound to the server. |
| nslookup yahoo.com | Query your default domain name server (DNS) for an Internet name (or IP number) host_to_find. |
| traceroute yahoo.com | Have a look how you messages travel to yahoo.com |
| ifconfig | Display info on the network interfaces. |
| ifconfig -a | Display into on all network interfaces on server, active or inactive.. |
| ping | Sends test packets to a specified server to check if it is responding properly |
| tcpdump | Print all the network traffic going through the network. |
| arp | Command mostly used for checking existing Ethernet connectivity and IP address |
| SYSTEM TOOLS | Many of the basic system utilities used to get things done. |
| ps | ps is short for process status, which is similar to the top command. It's used to show currently running processes and their PID. A process ID is a unique number that identifies a process, with that you can kill or terminate a running program on your server (see kill command). |
| ps U username | Shows processes for a certain user |
| ps aux | Shows all system processes |
| ps aux --forest | Shows all system processes like the above but organizes in a hierarchy that's very useful! |
| kill | terminate a system process |
| kill -9 PID | Immediately kill process ID |
| killall program_name | Kill program(s) by name. For example to kill instances of httpd, do 'killall httpd' |
| du | Shows disk usage. |
| du -sh | Shows a summary of total disk space used in the current directory, including subdirectories. |
| du / -bh | more | Print detailed disk usage for each subdirectory starting at the "/". |
| last | Shows who logged in and when |
| last -20 | Shows only the last 20 logins |
| last -20 -a | Shows last 20 logins, with the hostname in the last field |
| pwd | Print working directory, i.e., display the name of my current directory on the screen. |
| hostname | Print the name of the local host. Use netconf (as root) to change the name of the machine. |
| whoami | Print my login name. |
| date | Print or change the operating system date and time |
| time | Determine the amount of time that it takes for a process to complete + other info. |
| uptime | Show the number days server has been up including system load averages. |
| uname -a | Displays info on about your server such as kernel version. |
| free | Memory info (in kilobytes). |
| lsmod | Show the kernel modules currently loaded. Run as root. |
| dmesg | less | Print kernel messages. |
| man topic | Display the contents of the system manual pages (help) on the topic. Do 'man netstat' to find all details of netstat command including options and examples. |
| reboot / halt | Halt or reboot the machine. |
| mount | Mount local drive or remote file system. |
| mount -t auto /dev/fd0 /mnt/floppy | Mount the floppy. The directory /mnt/floppy must exist. |
| mount -t auto /dev/cdrom /mnt/cdrom | Mount the CD. The directory /mnt/cdrom must exist. |
| sudo | The super-user do command that allows you to run specific commands that require root access. |
| fsck | Check a disk for errors |
| COMPRESSION UTILITIES | There are many other compression utilities but these are the default and most widely utilized. |
| tar | Creating and Extracting .tar.gz and .tar files |
| tar -zxvf file.tar.gz | Extracts the file |
| tar -xvf file.tar | Extracts the file |
| tar -cf archive.tar contents/ | Takes everything from contents/ and puts it into archive.tar |
| gzip -d filename.gz | gzip -d filename.gz |
| zip | Compress files into.zip |
| unzip file.zip | Extracting .zip files shell command |
| compress | Compress files. compress filename |
| uncompress | Uncompress compressed files. uncompress filename.Z |
| bzip2 | Compress files in bzip2 format |
| THE (DOT) FILES | The good old dot files. Let's clear up some confusion here by defining each. |
| .bash_login | Treated by bash like .bash_profileif that doesn't exist. |
| .bash_logout | Sourced by bash login shells at exit. |
| .bash_profile | Sourced by bash login shells after /etc/profile |
| .bash_history | The list of commands executed previously. |
| .profile | Treated by bash like ~/.bash_profile if that and .bash_login don't exist. |
| .vimrc | Default "Vim" configuration file. |
| .emacs | Read by emacs at startup |
| CONFIGURATION FILES | Listing everything is beyond the scope of this article. |
| /etc | This directory contains most of the basic Linux system-configuration Files. |
| /etc/init.d | Contains the permanent copies of System V–style run-level scripts. These scripts are often linked to files in the /etc/rc?.d directories to have each service associated with a script started or stopped for the particular run level. The ? is replaced by the run-level number (0 through 6). (Slackware puts its run-level scripts in the /etc/rc.d directory.) |
| /etc/cron* | Directories in this set contain files that define how the crond utility runs applications on a daily (cron.daily), hourly (cron.hourly), monthly (cron.monthly), or weekly (cron.weekly) schedule. |
| /etc/cups | Contains files used to configure the CUPS printing service. |
| /etc/default | Contains files that set default values for various utilities. For example, the file for the useradd command defines the default group number, home directory, password expiration date, shell, and skeleton directory |
| /etc/skel | Any files contained in this directory are automatically copied to a user’s home directory when that user is added to the system. |
| /etc/mail | Contains files used to configure your sendmail mail service. |
| /etc/security | Contains files that set a variety of default security conditions for your computer. |
| /etc/sysconfig | Contains important system configuration files that are created and maintained by various services (including iptables, samba, and most networking services). |
| /etc/passwd | Holds some user account info including passwords (when not "shadowed"). |
| /etc/shadow | Contains the encrypted password information for users' accounts and optionally the password aging information. |
| /etc/xinetd.d | Contains a set of files, each of which defines a network service that the xinetd daemon listens for on a particular port. |
| /etc/syslogd.conf | The configuration file for the syslogd daemon. syslogd is the daemon that takes care of logging (writing to disk) messages coming from other programs to the system. |
| /var | Contains variable data like system logging files, mail and printer spool directories, and transient and temporary files. |
| /var/log | Log files from the system and various programs/services, especially login (/var/log/wtmp, which logs all logins and logouts into the system) and syslog (/var/log/messages, where all kernel and system program message are usually stored). |
| /var/log/messages | System logs. The first place you should look at if your system is in trouble. |
| /var/log/utmp | Active user sessions. This is a data file and as such it can not be viewed normally. |
| /var/log/wtmp | Log of all users who have logged into and out of the system. The last command can be used to access a human readable form of this file. |
Tuesday, December 12, 2006
writing to ntfs in linux
Writing to ntfs
- The NTFS-3G driver is an open source, freely available NTFS driver for Linux with read and write support. It provides safe and fast handling of the Windows XP, Windows Server 2003 and Windows 2000 file systems. Most POSIX file system operations are supported, with the notable exception of file ownership and access right changes.
The Linux NTFS project has released a beta version of its fully open source userspace (using FUSE) 3G-Linux NTFS support driver.I have not used this method,it is still in beta phase. - Other commercial Paragon NTFS driver and also Captive NTFS which is uses windows ntfs.sys driver under WINE.
Monday, December 11, 2006
How To Install Ubuntu(linux)
Step 1:Download a CD-ROM image(ISO file) and burn(for eg. to burn use NERO) it onto a blank CD-R.
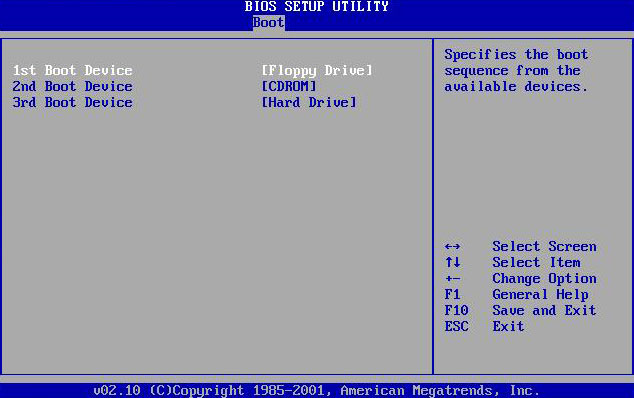
Step 2:Make sure that your BIOS is set to boot off the CD-ROM drive.Reboot your system.
Step 3: After starting computer again,below screen will be appeared.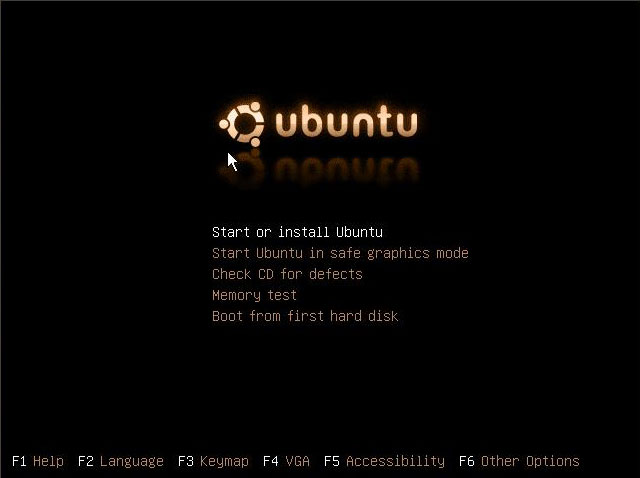
Select Start or Install Ubuntu and hit enter.
NOTE:If during the installation process the graphics appear garbled or warped, simply reboot the computer and at this screen select Start Ubuntu in Safe Graphics Mode. After hitting enter, Ubuntu will start loading the operating system.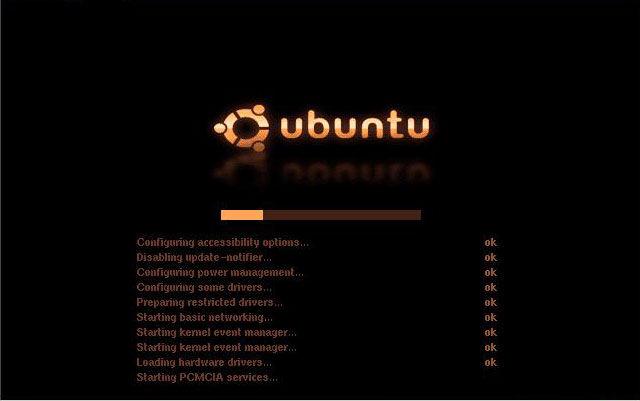

Step 4:Double click the install icon on the desktop. It will then ask you a series of straight forward questions, such as your language, location, and keyboard layout.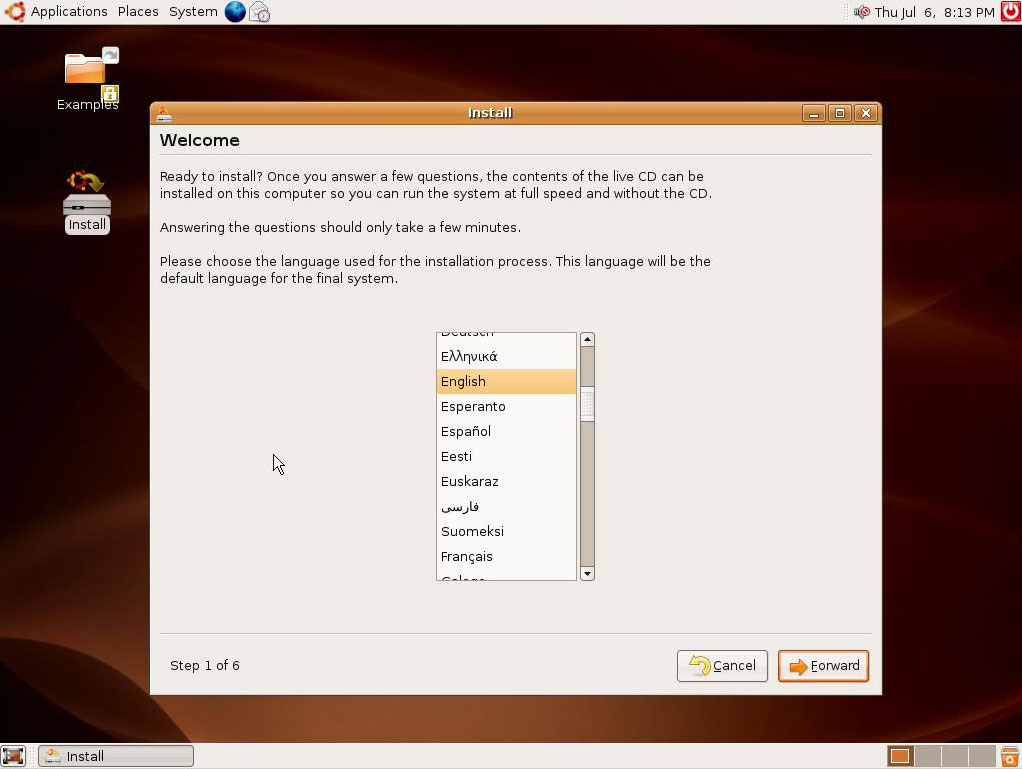


The installer will then ask you for your name, and your a user name for logging in.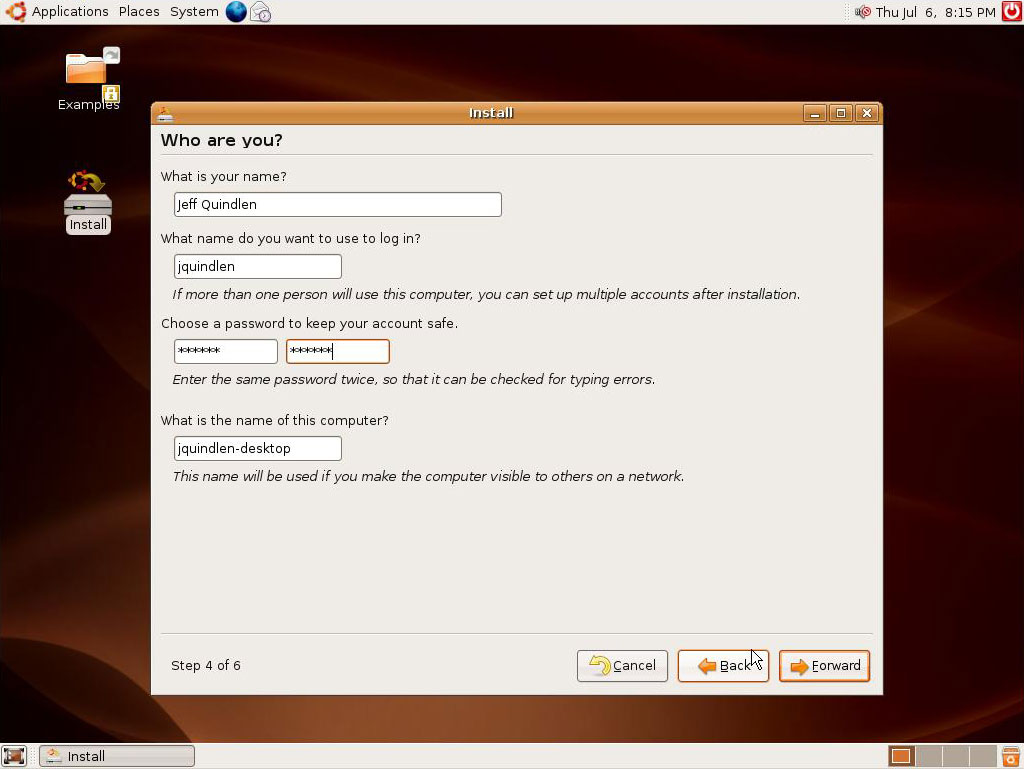
Step 5:Create a partition for Linux to use. If you're going to be dual-booting both Windows and Ubuntu, you'll need to make room for your Linux partition, unless you have some unformatted space on your hard disks.
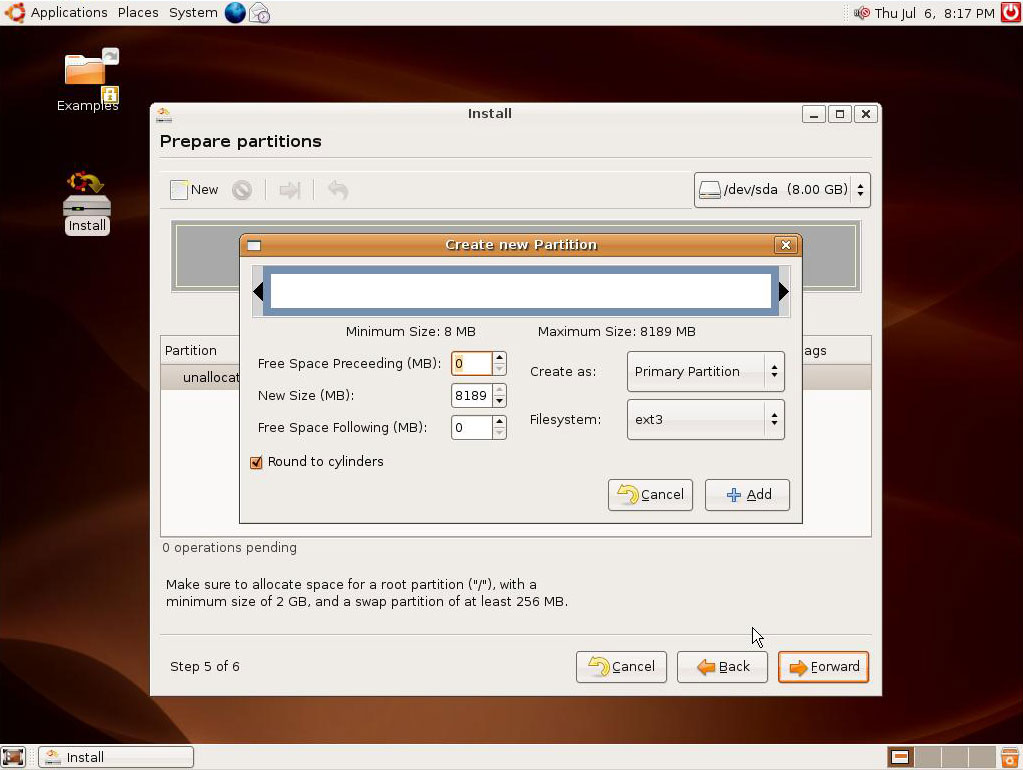
NOTE:Be careful not to erase a partition that contains data that you want to keep. You'll need to allocate at least 3GB of space for your Ubuntu installation, but a more realistic minimum of 10GB should be allotted so that you have room to install additional applications. For unformatted hard drive simply click new and use the full amount of space available.
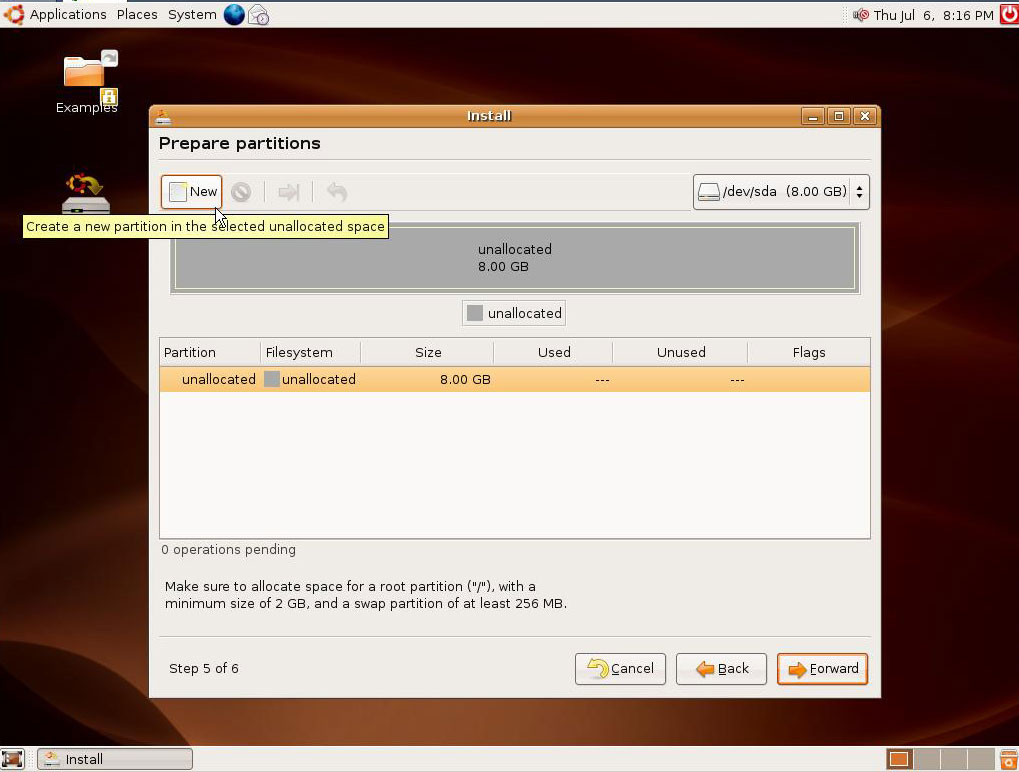
 After partitioning the hard drive, you'll be presented with a confirmation screen that will recap the installation procedure. Click the install button.
 Ubuntu will now format the disks, and install itself. This process will take some time.
 After the installation is done, Ubuntu prompts you to reboot . When you are ready to use your new Ubuntu installation, simply reboot and remove the CD from the drive.
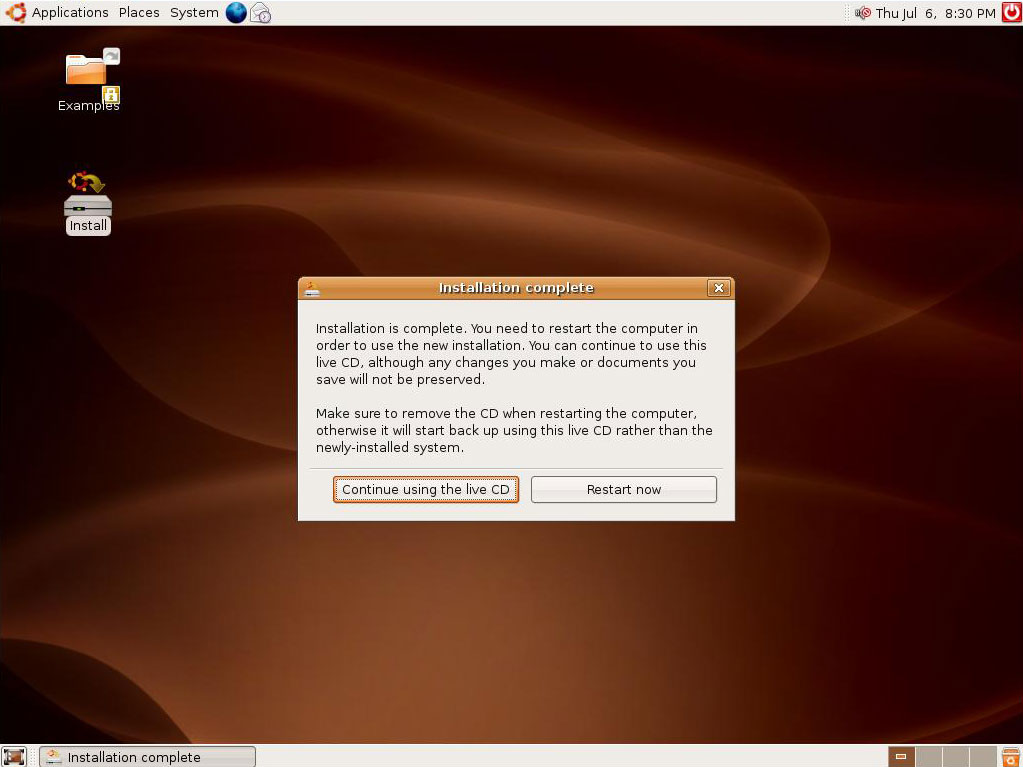
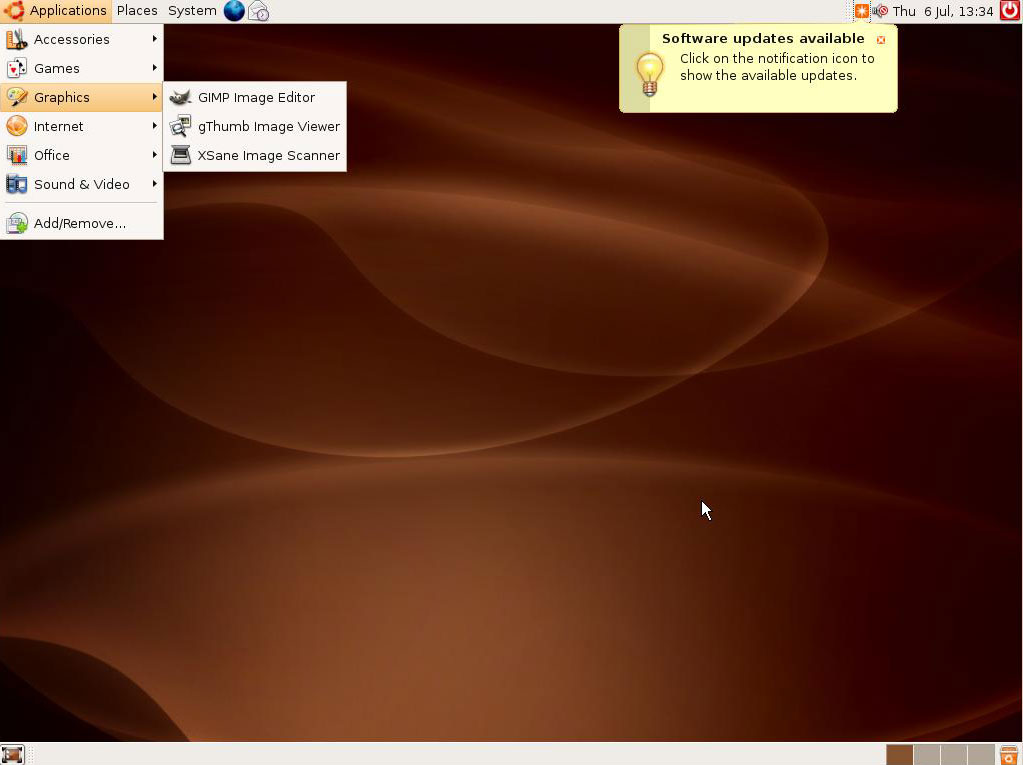
Step 6:After restart a login screen appears, simply enter the username you've chosen and hit enter. Next you'll enter your password. Ubuntu is now installed, ready to use .